


VeilNet Conflux CLI #
VeilNet Conflux can be installed as a system service for Windows. It is the recommended way until our GUI application is stable.
Install #
First, download the pre-compiled binary from:
- Stable
- Nightly
Then, open a terminal with administrator privileges, and run the following command:
.\veilnet-conflux.exe installConnect #
To connect with VeilNet, you will need a registration token, which can be acquired for free at https://auth.veilnet.app.
Then run the following command:
.\veilnet-conflux register \
    -t <your_registration_token> \
    --cidr <a_plane_subnet_ip> \ # optional
    --teams <team_list> \ # optional
    --tag \ #optional
    -p # optional
The register command has the following options:
- -t, –token: the only mandatory option, requires your registration token.
- –cidr: if set, the VeilNet Conflux instance will request to use the given IP address. If the IP address is used or falls outside the subnet of the VeilNet Plane, the registration will fail. Simply remove this option or try with a different IP address if an error occurs. This is similar to how you select a character name in an online game; the first instance requests the IP address will get it under Public Plane.
- –tag: Just a human-readable name for this instance, so you could remember and manage easily.
- -p, –portal: Set VeilNet Conflux instance to portal mode, which will allow access to local networks the host is on (subject to access control). If not given, VeilNet Conflux will be in rift mode and forward all traffic from the host via VeilNet. Consider that portal mode is similar to split tunnel in a regular VPN (not able to forward host networks on Windows).
The VeilNet Conflux will restart automatically upon host reboots.
Disconnect #
To disconnect from VeilNet, simply run:
.\veilnet-conflux unregisterUninstall #
To uninstall VeilNet Conflux from the host, simply run (in terminal with admin privileges):
.\veilnet-conflux removeUpdate #
To update VeilNet Conflux, simply download the newest binary. Execute the “remove” command and run the “install” command via the new binary.
VeilNet Conflux Application #
Install #
A GUI application for easy access is also available for Windows, currently under beta. If you would like to try it out, the installer is available at:
- Beta
Note that the application currently does not have a digital signature, so it may accidentally trigger anti-virus software because it will unpack “wintun.dll”, the driver for the TUN interface.
Authentication #
Simply click log in, and you will be redirected to the VeilNet authentication portal. Log in with your account normally, and then select the platform “Windows” and click “Continue”. The VeilNet authentication portal will authenticate the VeilNet Conflux application and redirect you to the main page.
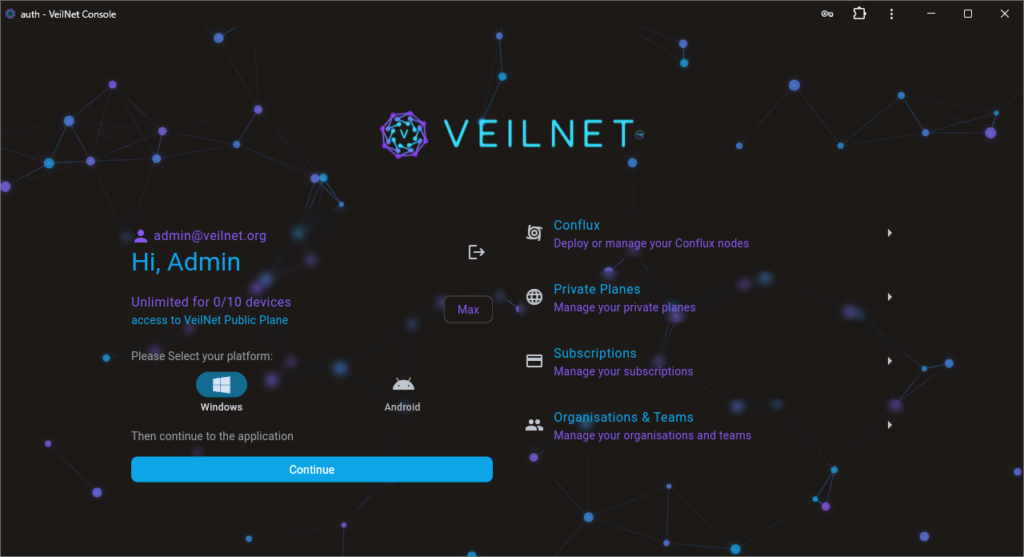
You must let the VeilNet Conflux application remain open during this process.
Connect #
To connect with VeilNet, simply choose a VeilNet Plane on the Plane view, accessible from the bottom navigation bar. Then click “Connect” on the home page (Note that the UI may flicker during connection; we are working on optimisations).
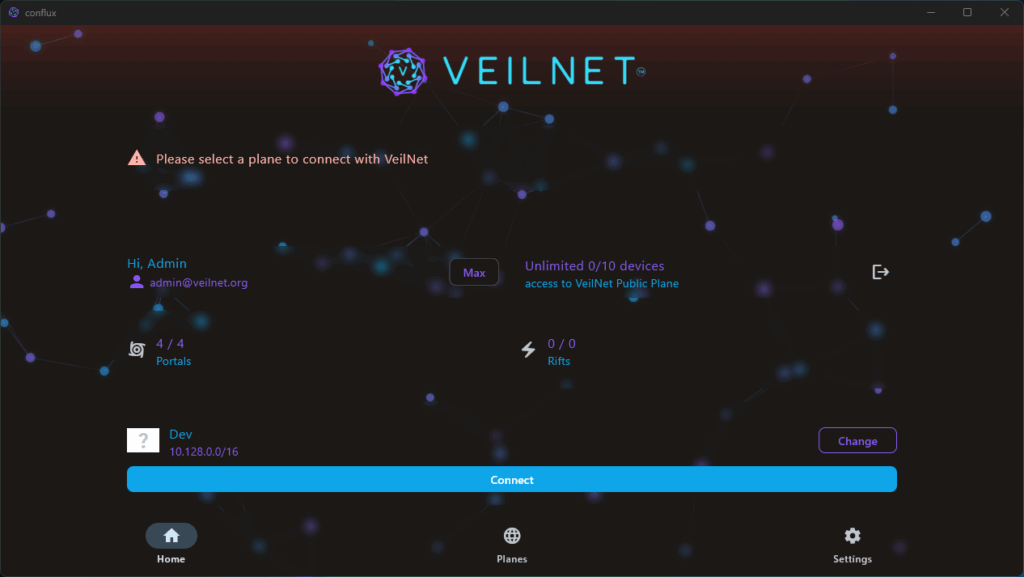
This application will connect you in Rift mode, which means all traffic from the host will now go through VeilNet. This allows you to reach any other host you have connected to the same plane (subject to access control).
If the connection fails or times out (30s), simply try again. If the problem persists, consider rebooting the host.
Disconnect #
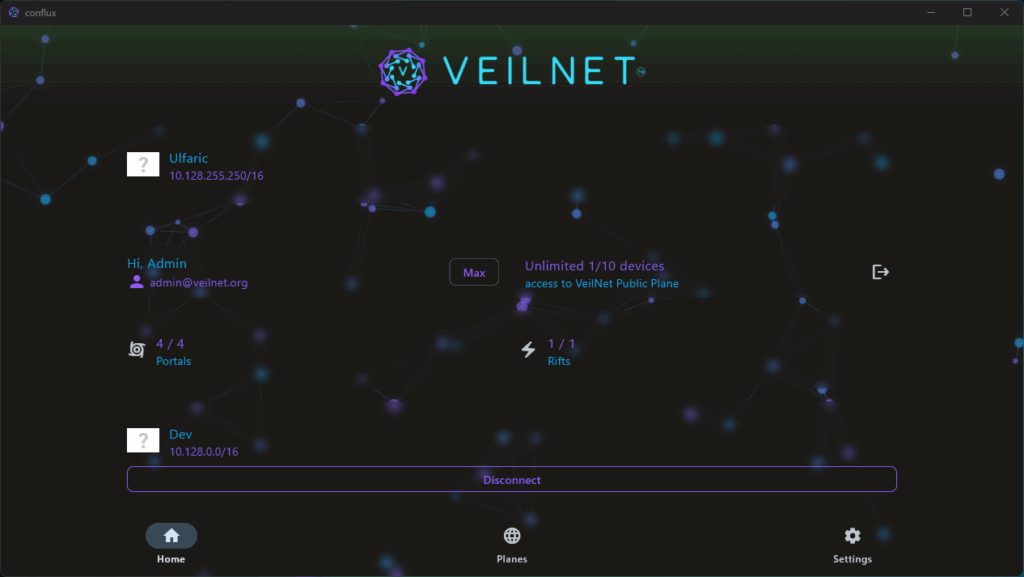
Simply click the disconnect button.
Uninstall #
Please uninstall from the control panel or settings, same like regular Windows applications. The VeilNet Conflux application does not install a persistent Virtual NIC on your host like other VPN software, so there is no cleanup needed.